

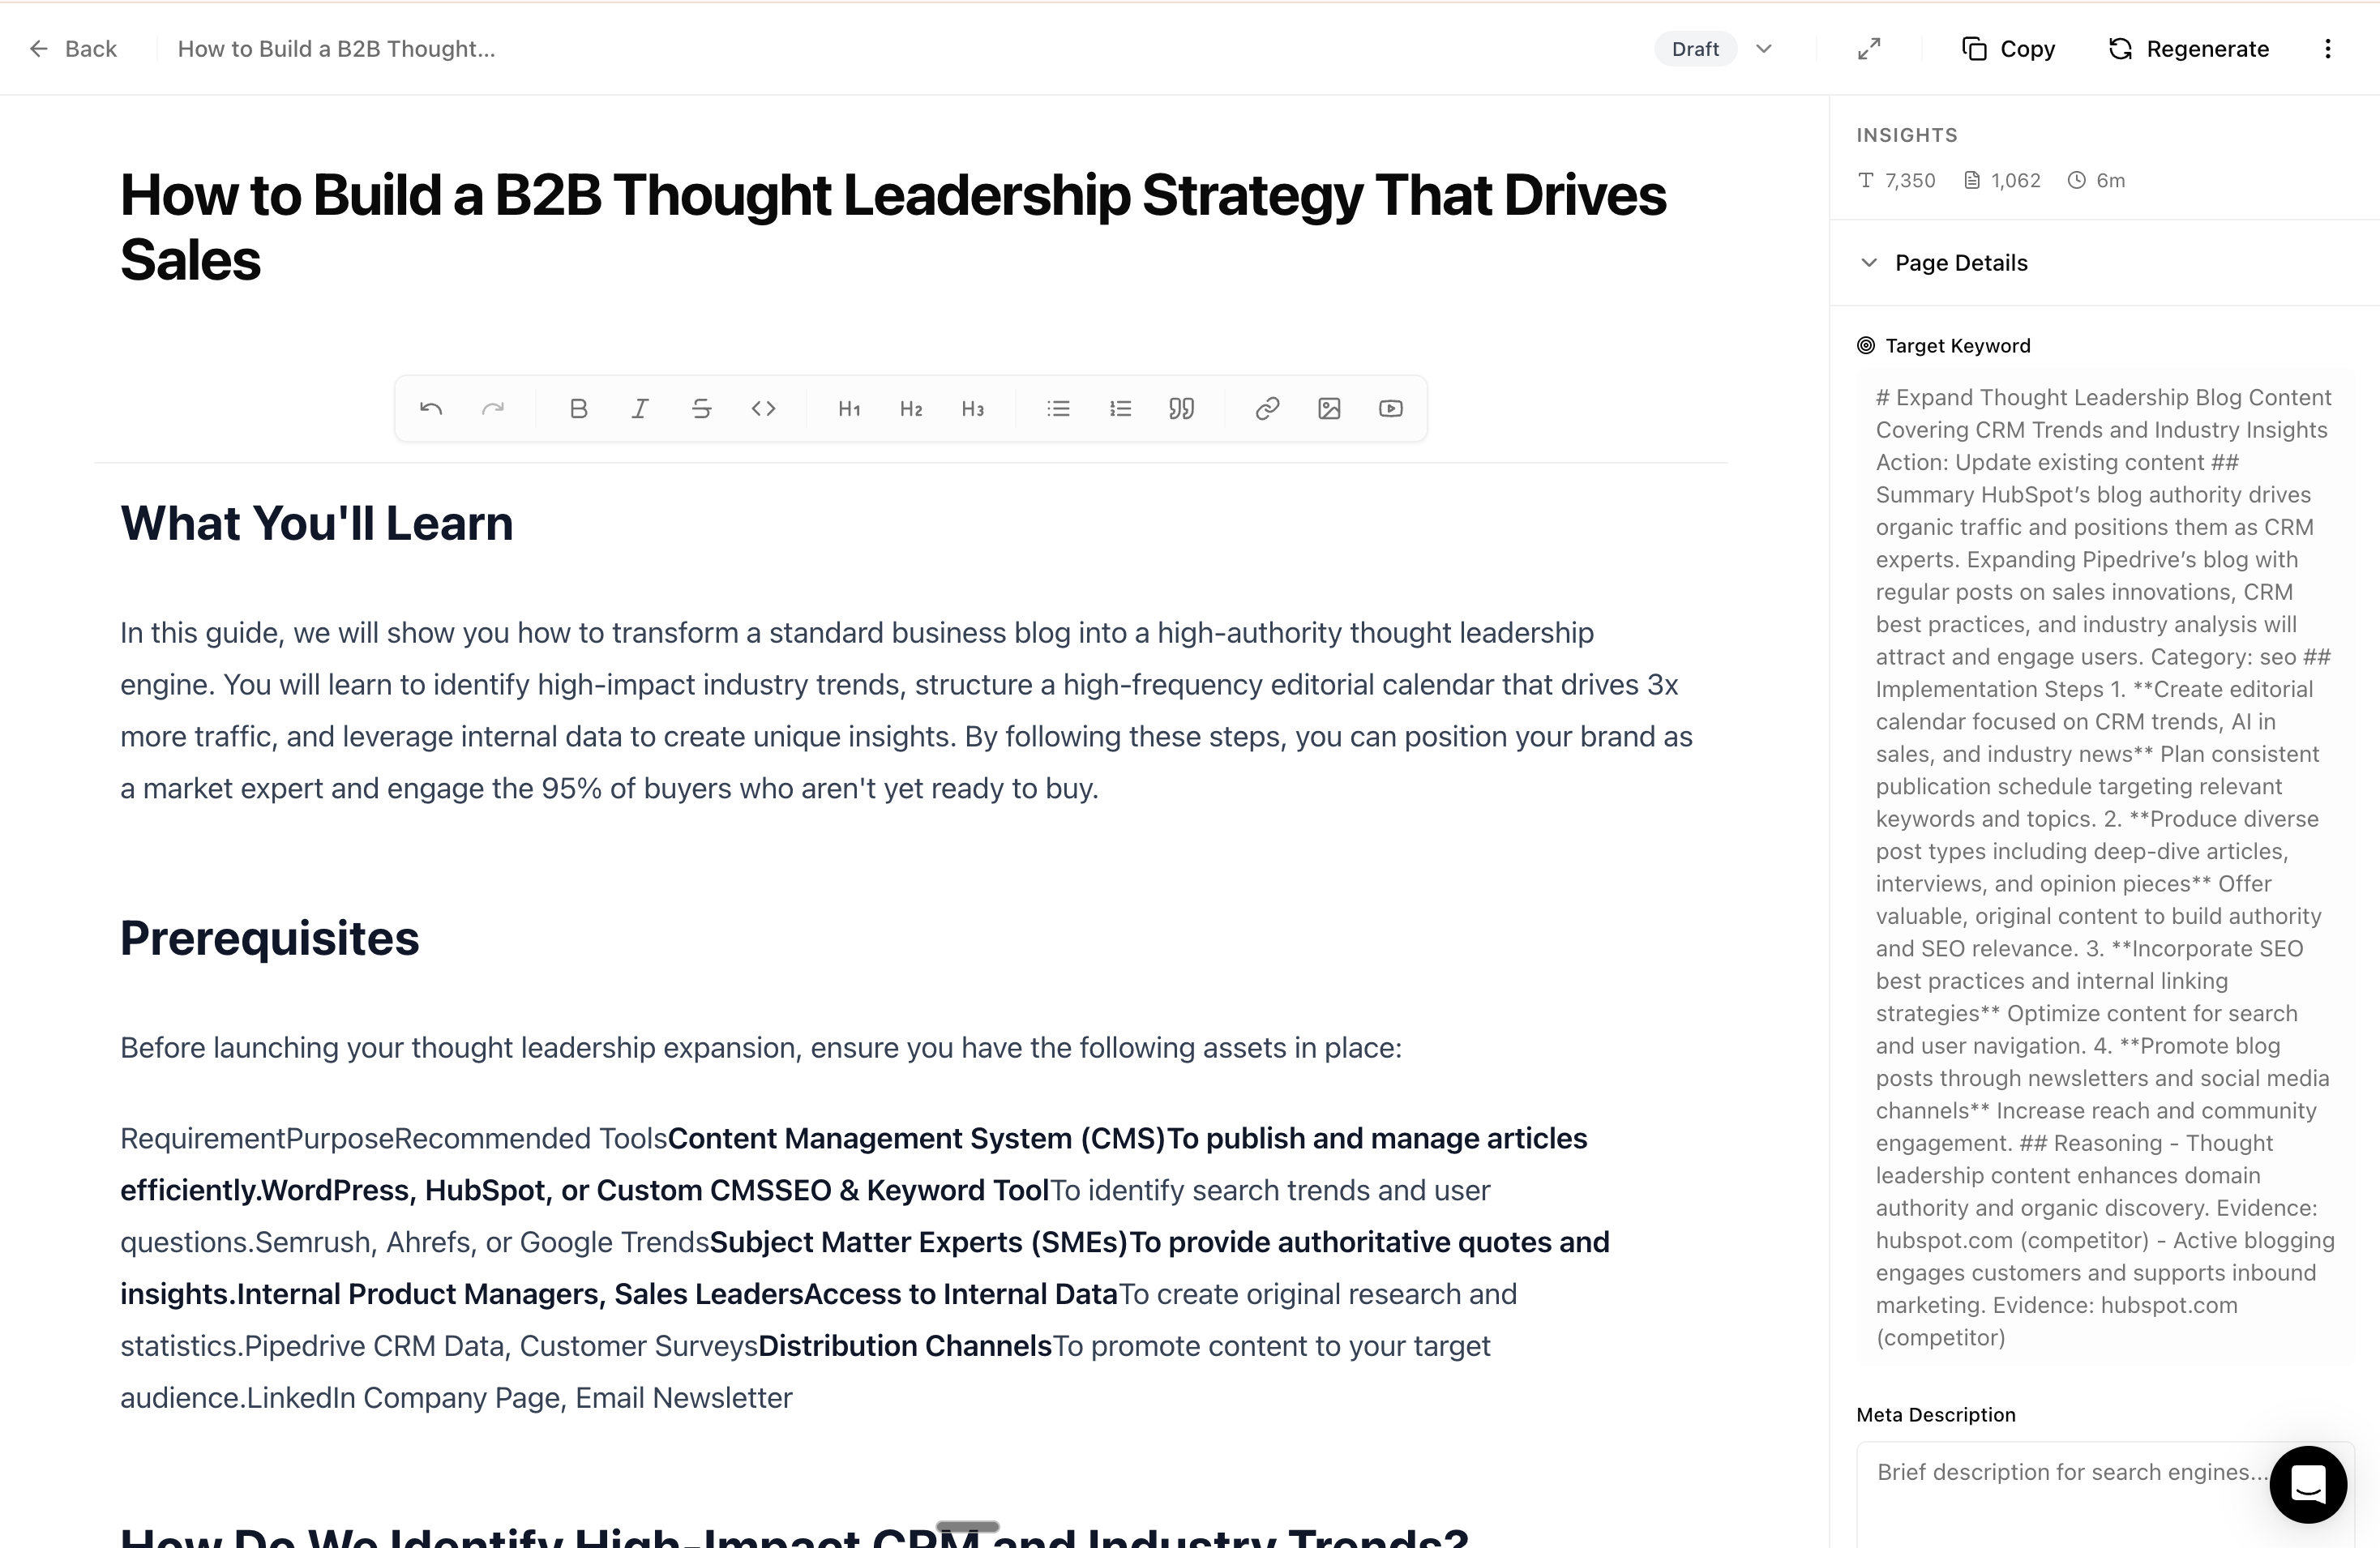
Opening content in the Editor
Open any content from the Planner:- Go to Planner and switch to List view
- Find the content you want to edit
- Click Edit
Adding your own content
Studio generates the foundation. You add the finishing touches.Custom images
Add your own visuals:- Product screenshots — Show your actual product
- Custom graphics — Branded illustrations or diagrams
- Photos — Team photos, office shots, real examples
- Infographics — Visual data or process flows
Videos
Embed videos to enhance your content:- Product demos — Show features in action
- Tutorials — Walk through processes step-by-step
- Testimonials — Customer stories and reviews
- Explainers — Concept breakdowns
Internal knowledge
Add information only you know:- Specific pricing or offers
- Customer quotes or case studies
- Technical specifications
- Company-specific processes
Editor features
Rich formatting
Headers, lists, bold, italic, links, and more
Image upload
Drag and drop images directly into your content
Video embed
Embed YouTube, Vimeo, or Loom videos
Auto-save
Never lose your work — content saves automatically
AI assistance
The Editor can help you refine content:Optimization score
As you edit, the Editor shows how well your content is optimized: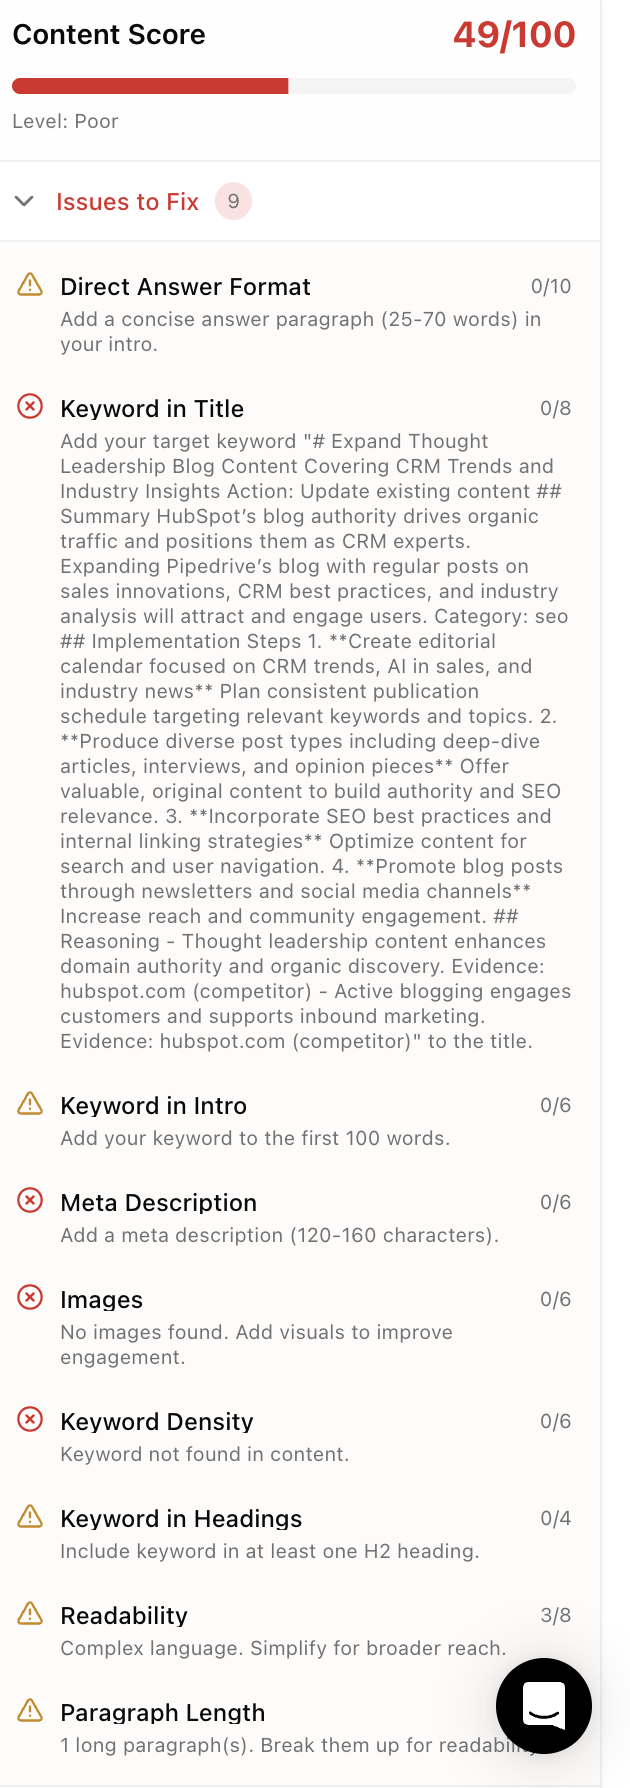
The Editor provides specific suggestions to improve your score.
Exporting content
When your content is ready:Export formats
Publishing workflow
- Finish editing in Studio
- Export in your preferred format
- Paste into your CMS (WordPress, Notion, etc.)
- Add any CMS-specific elements (categories, featured images)
- Publish
- Mark as “Published” in your Studio Library
Tips
Let Studio handle the heavy lifting
Don’t rewrite everything. Studio creates content based on your settings and target prompts. If you’re making major changes, consider adjusting your default settings instead.Focus on what makes you unique
Add:- Your specific examples and case studies
- Internal knowledge competitors don’t have
- Real product screenshots and demos
- Customer quotes and testimonials
Next steps
Generate content
Create new articles
View all content
Browse and manage your content